Zip-a-Dee-Doo-Dah!
Last week I purchased six mid-century frocks from the estate of a former co-worker's mom. I left behind several lovely items that were beyond repair, or just not worth the time and money required to make them wearable and saleable.
A light-blue, full-skirted, lace party dress with a chiffon neckline almost missed the cut. Its back zipper had separated, and I could not get it to slip back together. But the dress was so pretty, and hadn't I read somewhere how to fix this exact problem? Ah! a challenge.
Hoping I would not have to turn to a seamstress for help, or replace the zip with a modern one, I granted the dress a last-minute reprieve and brought it home. And here's what happened.
As background, I do not sew. Not really. Sure, I can do small repairs -- darning, re-hemming, replacing a thread eye or French tack, and the like -- by hand. And I have a sewing machine, which I'm afraid of. I use it mostly for minor repair jobs involving stitching in a straight line. Tailoring is for experts. Folks like my mom, my friend Deborah, or the seamstress down the road. I stick to the amateur stuff and bring the tricky jobs to a professional.
But how hard could it be to fix a zipper? Surely I could do this. Didn't it involve snipping the end off, realigning things, rethreading the teeth into the pull, and sewing it back together down at the bottom?
I called Deborah (not home). I nearly posted to vintage groups asking for help. But then I remembered the glorious wealth of tutorials available on YouTube.
I typed "Fixing a Vintage Zipper" in the search box and watched this video, which confirmed what I'd thought I remembered. Then, I gave it a try.
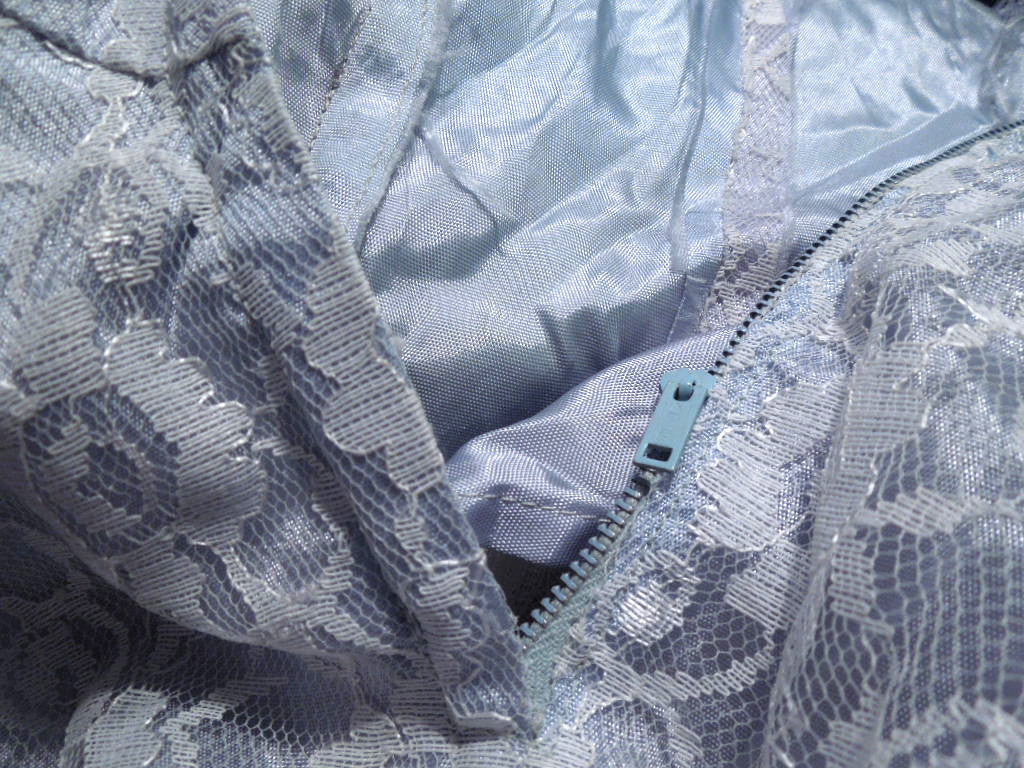
Here's how the zipper looked before I started:
Looks as if you could just thread those left-hand teeth right back onto the pull, doesn't it? Trust me, you can't.
So I snipped the bottom of the zipper away from the interior of the dress: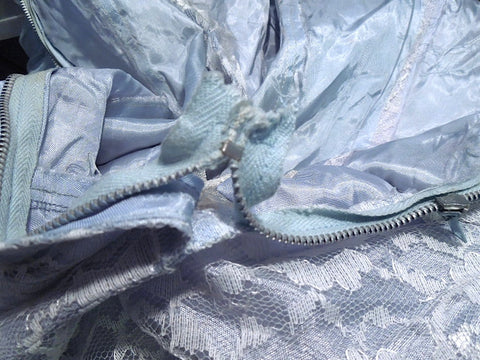
When I pried off the metal end stop, the two halves separated: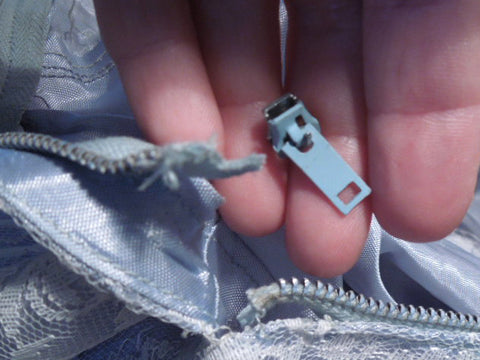
I tried to thread both sides back onto the pull, but there was something wrong with one of the teeth on the left-hand side. So I snipped the zipper off at the offending tooth and tried again.
It zipped. But having neglected to even up the two sides, I ended up with this:
Not good.
I tried several times to get things aligned properly, to no avail. So I used the "snip into the row" trick shown in the video:
I then pinned the zipper closed in a few spots to keep it aligned, et voilà!
Woohoo! That's more like it.
The next step was making this new alignment permanent. I attempted to reattach that little metal end stop I'd removed. Sadly, as the video lady had warned, one of the teeth had snapped off and there was no reusing it:
So I used the technique I'd originally imagined, which was to sew, tightly, several loops around the teeth at the bottom. This creates a new end stop. I bound together a few additional teeth below that as well, for good measure. Here's how it looked: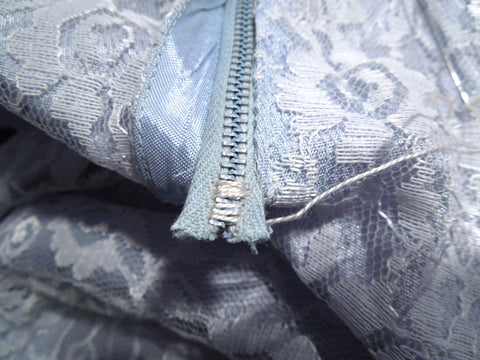
I then stitched the repaired zipper back into place on the lining, and used regular, coordinating thread to close up the short length of open back seam.
Here's how it looks now on the inside:
And here's how it looks now on the outside. With the zipper exposed:
And how it looks as the dress is worn (I'm pointing to where the repair ends):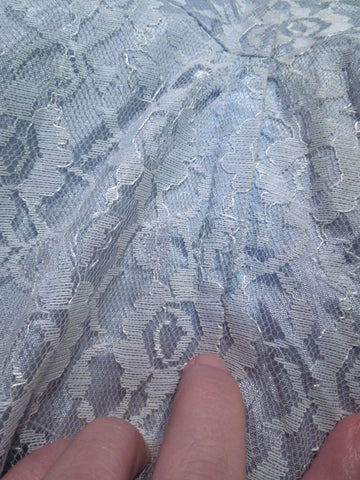
That's what I'm talking about! Go me! Go me! I did a little happy dance and nearly pulled a muscle patting myself on the back. I called Deborah and left another message telling her I'd done it and thanking her for her ongoing, telepathic, moral support.
I may be overstating my workmanship here, but really, you'd never know the zipper had been broken!
I'm sharing this with you because, beyond my excitement at mastering a useful skill while saving a lovely vintage frock from unnecessary alterations (or the trash heap!), I thought you'd be interested in seeing just how much effort is involved in getting a single vintage dress from estate to web site.
Some people have mentioned that vintage dresses can be pricey. Perhaps this sheds some light on why that's the case. Repairs like this are commonplace, and just one reason the good vintage items aren't necessarily dirt cheap.
It's not just that these dresses are getting harder to come by, or that they're better made than modern equivalents (if such things even exist). It's also about the time, effort, and care that goes into rendering them wearable and presenting them to you in their best light.
This particular dress has already taken several hours of my time. And I've yet to wash it (that's a whole other story, and not a short one), take measurements, shoot photos, write the description and post the listing. You get the idea. It's a lot of work. And I'm happy to say that I love every minute of it.

Comments
Good for you Liza! I’ve been using that zipper trick for over thirty years and it’s so much easier than replacing a zipper and so satisfying when you get it to work again.
I’m sure this article will help save more vintage dresses from unnecessary alterations (or the trash heap!). Thanks so much for sharing – and in such great detail! Another Deborah, but one who does not sew :)
I am so glad you posted a blog on this subject. Surprising, not too many people have ever seen a zipper repair. And you did it like a pro!
Now, maybe we can save and repair our beloved garments. It’s so sad when they have to leave the closet or drawer they call home.
You did a great job!!! And thank you for taking the time to post and share.
Love this article – thank you for the tips! I often find zippers like this on vintage dresses so I’ll be trying this in the future.