Making 18th Century Patchwork Pockets
I don't enjoy quilting. True, I've only ever done the most basic sort -- cutting and assembling squares into strips, strips to each other, and... te-di-ous!
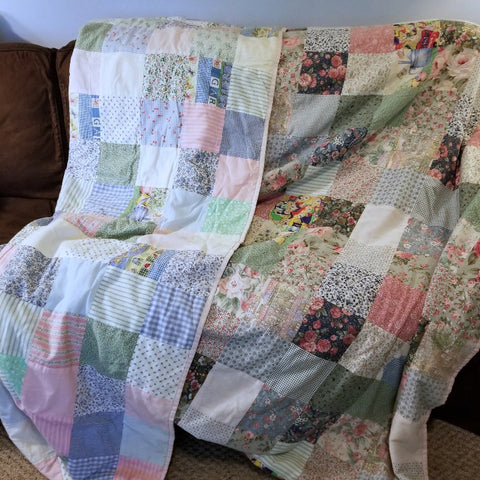 Basic patchwork quilt by mom and me. I cut and assembled, she finished.
I like the result, but don't enjoy the process. So what's the point? It may save money over store-bought, but only if you have lots of scraps on hand and don't factor your time into the equation.
I admire well-made, artistic quilts. I've watched tutorials, thinking I should give it a try. But all the cutting, piecing, and rearranging to create those intricate named patterns feels a bit too much like higher math. I find "with right sides together" challenging enough. I'm not good at visualizing several steps ahead. It's why I stink at chess.
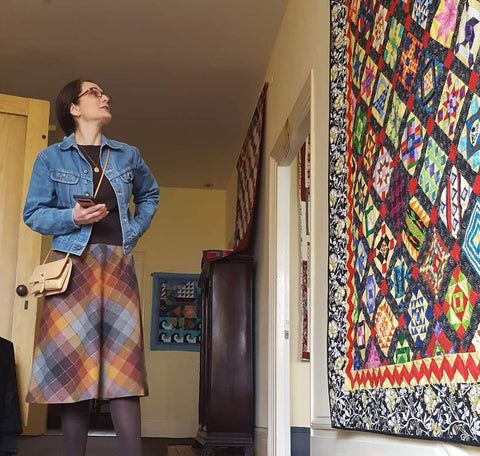 Admiring the real thing at Bulloch Hall's annual guild show (photo by Melissa Feuer).
Even if I took the time to learn all the magical maneuvers, what to do with the results, good or bad? I have only so many beds and sofas, and my walls are full.
But last spring in Colonial Williamsburg I saw something that inspired me. Something that uses up scraps, doesn't require mathematical prestidigitation, and serves a function. Look in this drawer:
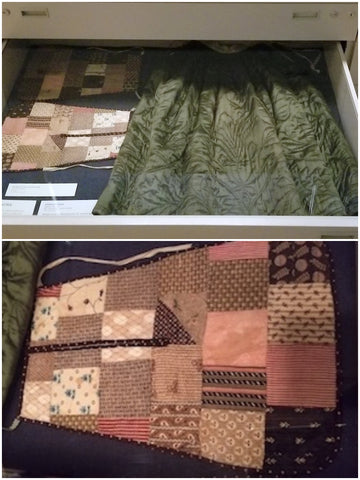 18th century pockets (and quilted petticoat/skirt) at Colonial Williamsburg.
Now that seemed doable! Fun, even. It's small enough to complete before I lose patience, an excellent use for leftover bits of favorite fabrics, and with the practicality I desire in most anything I make or buy. Bonus: I actually "needed" one of these for my 18th century costumes.
I was already familiar with antique pockets. They were tied, singly or in pairs, around the wearer's waist, and accessed through hidden openings at the sides of her skirt. It's what Lucy Locket lost and Kitty Fisher found. How long did you wonder how someone could possibly lose her pocket, and not just whatever was in it? Yep, me too. Decades.
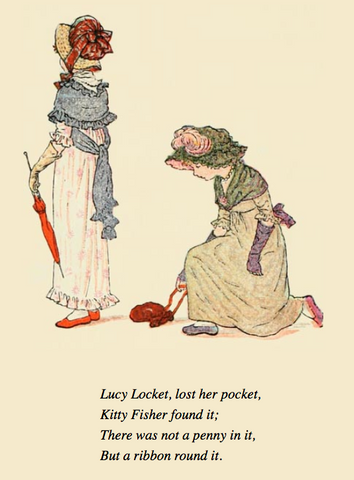 Kate Greenaway illustration found at the Gutenberg Project reading room.
Built-in pockets didn't come into regular use in women's clothing until fairly recently (and have now gone missing), although menswear has had more than its fair share since way back.
 Liza, hiding cellphone behind back, to Mr. BDV: "Hold this for me, would you?"
When dresses became more diaphanous and form-fitting, bulky separate pockets became obsolete. The Regency-era Lucy in Greenaway's illustration probably wouldn't have had a pocket beneath her slim, lightweight dress. And that red "pocket" Kitty has found looks a lot like a reticule (small, drawstring purse).
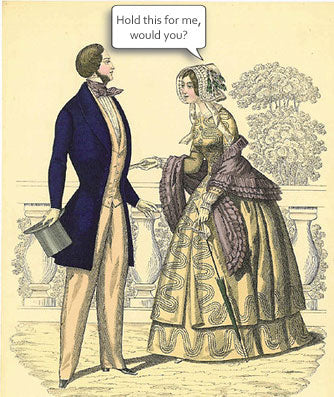
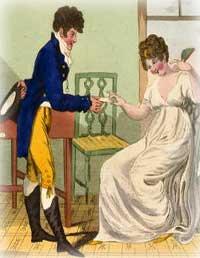 Regency lady to gentleman: "Hold this for me, would you?"
Even when skirts became (enormously) full again, the era of the separate pocket was mostly over. Can you imagine an outfit more perfectly suited to concealing copious separate pockets than this mid-Victorian hoop skirt ensemble?
Yet, there's only one way to access what's beneath, and no one would do so in public. She's forced to carry a purse. Seems like a serious waste of storage space. IKEA could create a living room under there. But, no pockets.
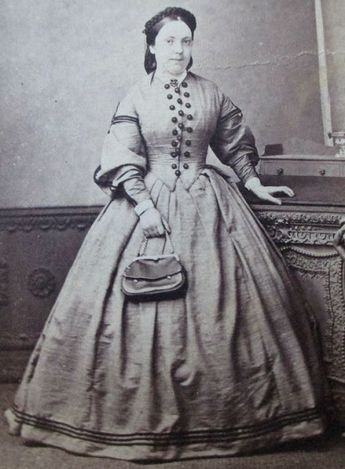
The Civil War-era traveler below could stash everything in her duffle bag into a few pockets beneath her skirt, and she'd be hands free for parasol and fan!
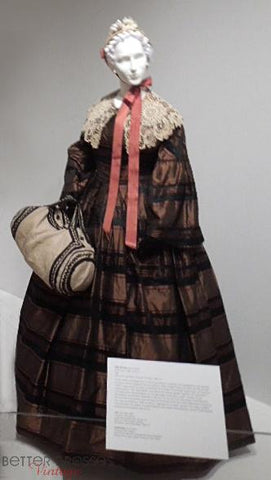
Civil War-era ensemble at The Mint Museum.
Some of my original Victorian dresses and skirts have integral pockets (the tiny sort at the waist meant for a watch and the more typically sized sort in a side seam). But they're from later decades and by then, women relied mainly on chatelaines for holding regularly used tools, and a handbag or travel bag for everything else. The separate pocket was a relic. More's the pity.
Even though they were hidden and seen by few, pockets were often exquisitely decorated, usually with embroidery. A secret not unlike "Victoria's" -- decorative underthings hidden beneath conservative work clothes. I wondered if women of earlier eras found such whimsically beautiful personal accessories empowering.
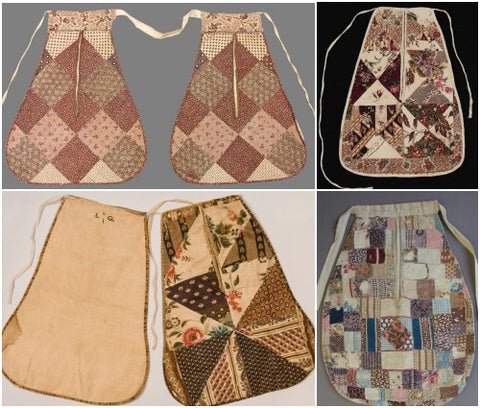
I also wondered if patchwork pockets had been a thing. A little research told me yes, definitely. Here's a sampling. The doubles are at Winterthur, the singles are in the collections of Boston's Museum of Fine Arts (top) and England's Royal School of Needlework (bottom):
Ready to give it a try, I dug through my scraps. I liked that I could recall what each fabric had been used for or salvaged from. At first I thought I'd go with "any colors and patterns at all" as if I were some non-OCD free spirit. The idea was to wind up with something like the pocket at bottom right, above. Ha. Know thyself.
I stashed away all but the pinks and greens for another project and started hunting for a simple tutorial.
Turns out, you don't need a formal, printed pattern even if you aren't all that experienced or skilled. There are enough free, on-line how-tos to work it all out.
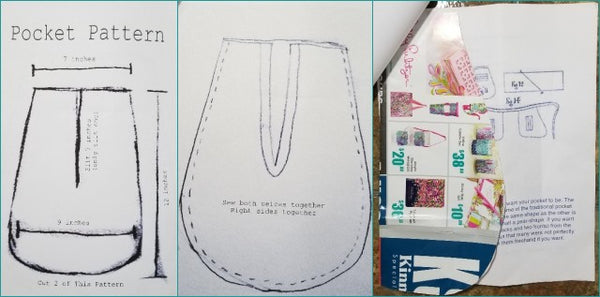
I used the dimensions provided above (7" wide across the top, 9" wide across the bottom, 12" high), and various sets of free online instructions as guidelines.
First, I needed to create the patchwork panels. Time to "quilt." I figured if I made a rectangle as tall and as wide as the template, plus another inch or so all around for seams, that would be fine. And it was.
My first attempt at a "crazy quilt" approach was a disaster. I'm not sure how you go about using all sorts of different shapes and sizes of scraps, but that's a mystery for another day. I'd stick with squares and rectangles and make strips of whatever height the smallest swatch of remaining fabric allowed. The "craziest" I got was the two times I created a "block" from two smaller pieces. Oh, boy.
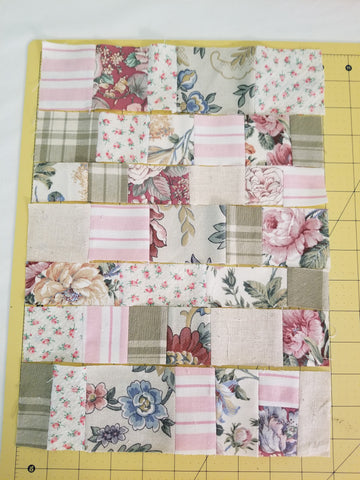
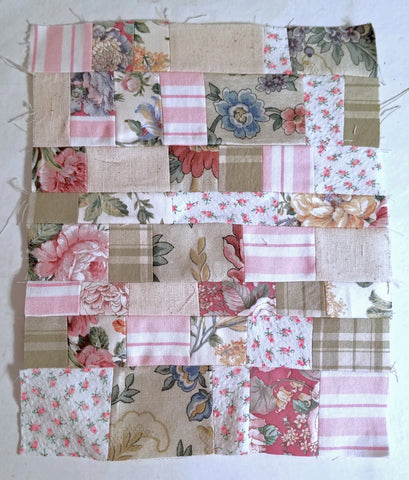
Here's how the first panel looked before I sewed the strips together:
Just when I thought I had it right, I'd see something "unbalanced" and move the strips around some more. Tall strips needed to be at top and bottom because they'd lose height in the seaming. I'd also lose whatever was at the upper, outer edges and I'd have to slice down the center, so best not to have any favorite or tiny pieces in those areas.
I made, weeks apart, two panels of the same fabrics but in different arrangements. I was bummed to have only two little pieces of cranberry-background floral for the second panel, but pleased at how quickly and easily it came together. Shortish, flattish learning curve. Here's the fully sewn second panel:
 Terrible photo of the completed second panel, awaiting cutting.
I decided to line the panels with handkerchief cotton left over from making a modesty scarf/fichu. It didn't add any weight or bulk, and should protect the patchwork from falling apart with use.
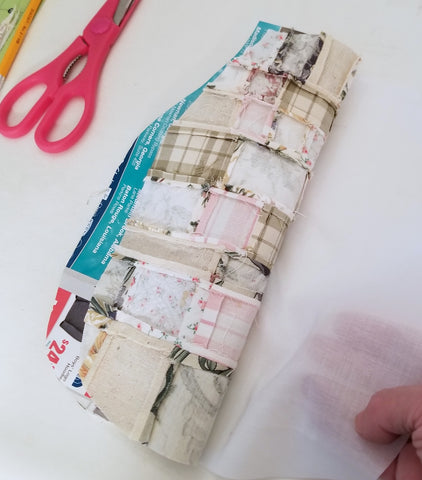
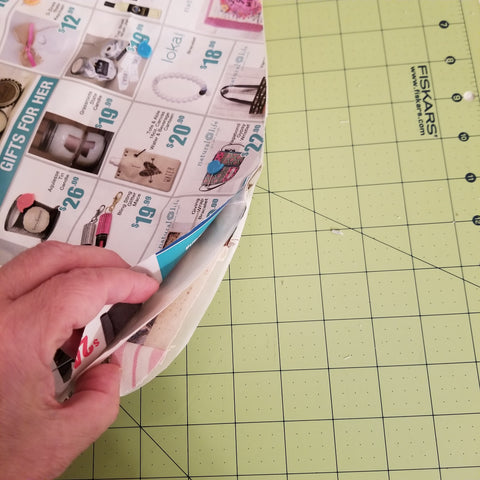
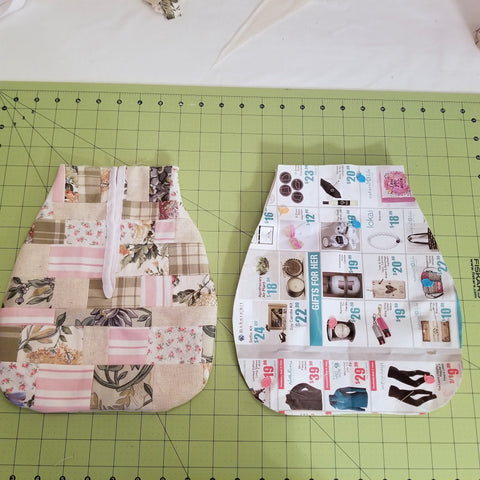
I folded a piece of a newspaper advertising insert in half, trimmed it to the size of the uncut panel, and then drew half an approximate pocket shape. Unfolding gave me a symmetrical pattern. As you can see in the photo below, it was a bit too square in spots and looked like a hot water bottle (I'm no artist), so I tweaked it a bit and recut.
 Pocket front interior view, with lining, cut out using not-yet-perfected pattern.
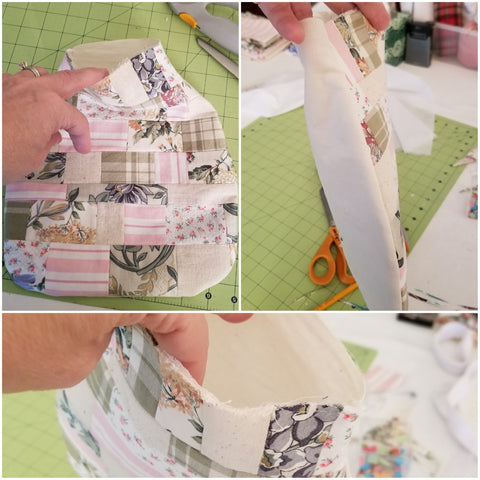
Here's how it looked, still pinned together, after cutting all three (ok, five) layers out. Pattern, then back and front "with right sides together," then interlining.
 All three layers (exterior+lining counts as one), pinned together and cut out.
I'd planned to line the fronts before sewing them to the backs. My mom said, "Just do it in one." So I did.
FYI, to this point everything was machine sewn. I'm busy, impatient, and really, I'm using it to hold a cellphone, car keys, and credit cards, so I can't take the charges of the historical-accuracy police too seriously.
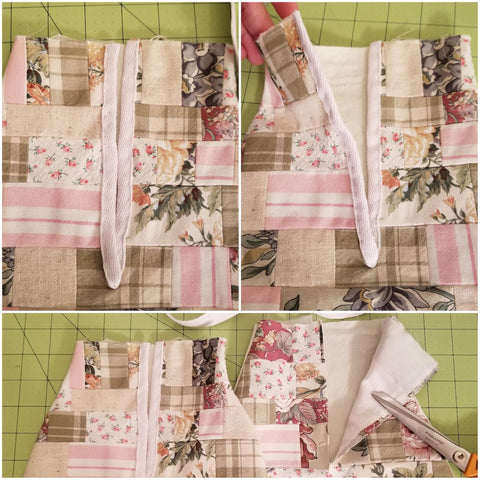
Here's how it looked sewn together, flipped right-side out, and awaiting the scariest part -- cutting the slit down the center:
 Pocket layers sewn together and flipped right-side-out.
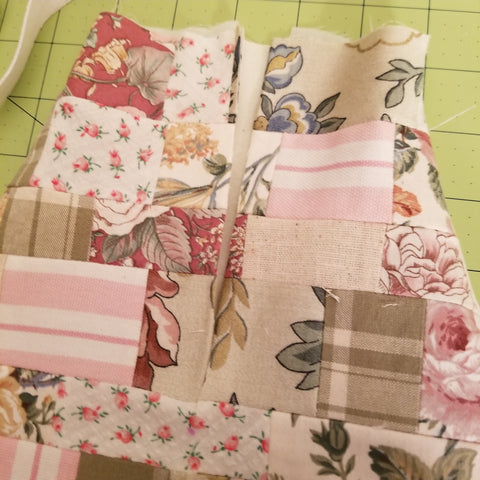
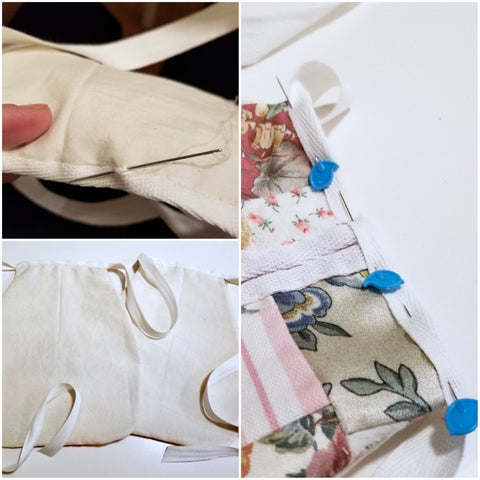
The next step was finishing the edges of the slit. I used cotton twill tape, and mostly because it offers more control and less likelihood of disaster, but also because it's visible and would look "better," I did this part by hand. I pinned the tape in place along the slit, stitched it to the interior, then to the exterior.
 Before and after finishing the slits with twill tape.
Here's a view with the unfolded pattern:
 Pocket and pattern, side-by-side. Nope, my sewing is not perfect.
The last step was attaching the waist tie, which also serves to finish the raw tops of the pocket(s). I forgot I'd used up all my twill tape making my 18th century petticoat (skirt), so I had to stop the process to go buy more. Annoying!
Same process as for the slits, but easier, as it's straight across. I pinned the pockets to the twill tape at either side of me, but off-center on its length. This meant I could tie the bow off-center. I left the tails long enough to tie it below my waist, at my hips.*
And here are the finished pockets. I'm pleased with the overall result. They're big enough to hold just about anything, comfortable to wear, and the patchwork is full of memories.
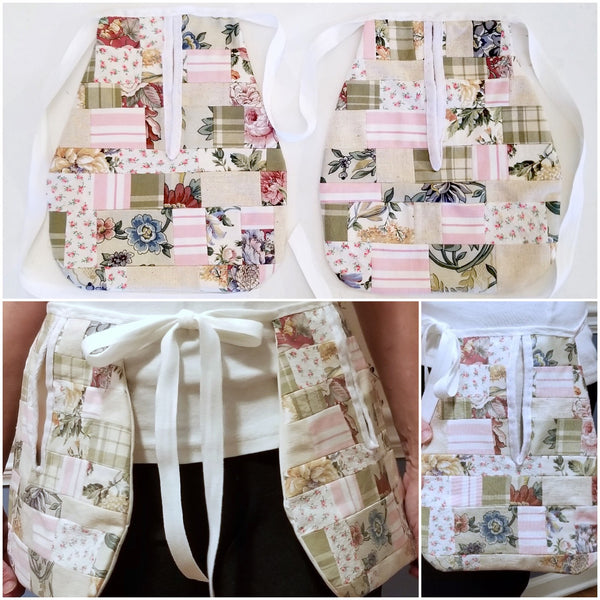 The completed pockets.
I'm thinking we should bring this accessory back into style. Why not? They offer plenty of storage (whether worn singly or as a pair), endless variety for personal expression and showing off handiwork, and are more comfortable to wear than any purse. Fanny packs/bum bags are making a comeback for good reason -- they're handy and handsfree. But I'm sure you'd agree these are a more attractive solution, no?

* By the time you're fully clothed, you've likely got a lot around your waist. This is true for many historical eras. It's wise to tie each in a different spot, at a different height, if possible. This not only avoids bulk, but prevents an "I'm tangled and stuck and freaking out!" moment.
