Repairing an Antique Blouse
Nearly 2 years ago I purchased this antique blouse from an Etsy seller:
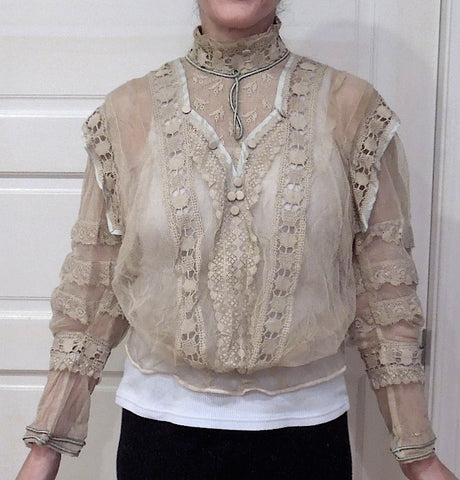 (My modern tank top doesn't create the right silhouette, but you get the idea.)
The blouse had been listed as final sale. When I explained to the seller that it might not survive cleaning, she offered a small discount to help offset my risk.
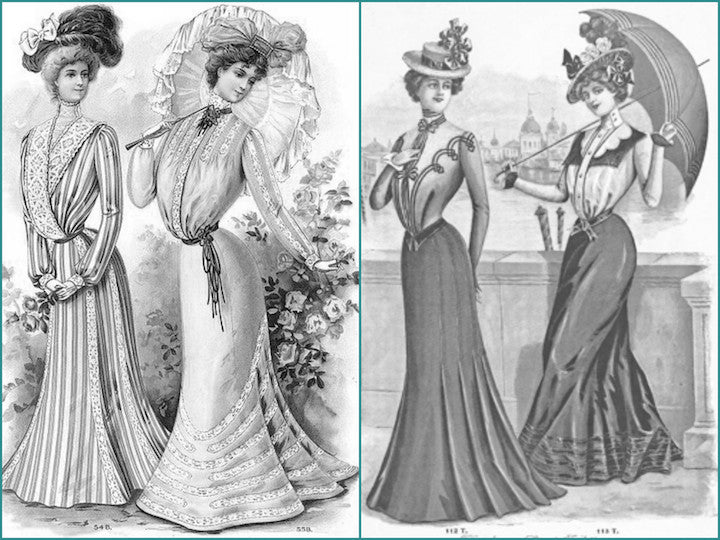
It was the right size (length can be a challenge for my super-long torso) and the medium-blue corded trim would match my "orphan" antique wool skirt of the same era. So I bought it.
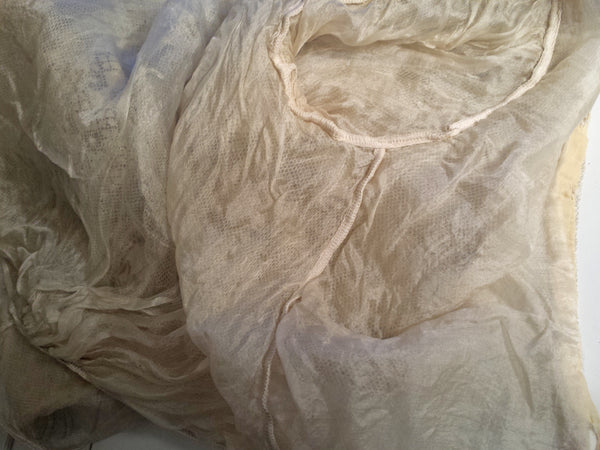
When it arrived it was darkened and a bit stiff from a century of collected dust and dirt, and it smelled old. There were no obvious stains and it wasn't mildewed, but the blouse was filthy.
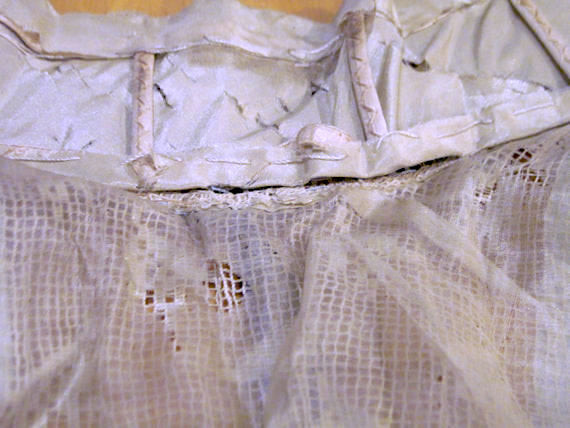
The exterior fabrics appeared sound, but the silk lining was a different story. And because the collar lay against the skin, not protected by undergarments or loose fit, it was badly damaged. Its lining was shattering. You can see several holes in the bodice lining, as well, but it's not shattering so there was hope:
I didn't photograph the cleaning process, but I think I gave it a very gentle hand-washing in my favorite Dollar General liquid soap. Eventually the rinse water was clear and the blouse was clean enough.
And it had survived. Mostly.
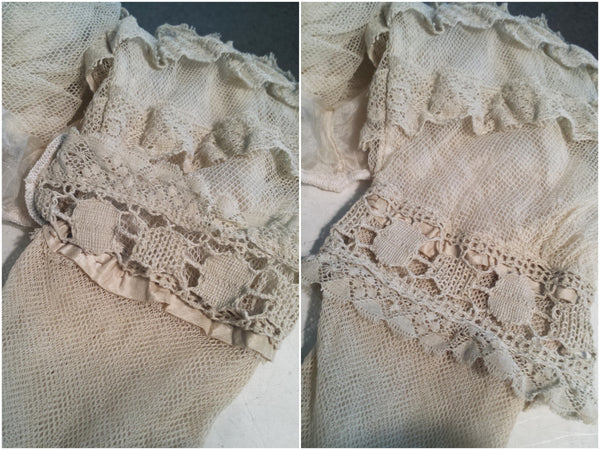
The bodice and sleeve linings remained, but as expected, the collar lining was mostly gone.
A few seams had come apart when their cotton and silk threads, which degrade faster than fabrics of the same materials, disintegrated. One lower sleeve now dangled freely from where it had attached to its upper sleeve. But no big deal.
It was the collar I worried about. The stitches attaching its satin-covered boning framework were mostly gone, leaving the whole thing collapsed and disheveled. I had to do something! So I put the clean blouse on a suitable hanger and stashed it in my cedar closet for a year and a half. Problem solved.
About 6 months ago I decided to stop procrastinating. I gathered all the "small projects" I'd stashed away, including antique underthings needing patches, mid-century dresses needing buttons or hemming, modern thrift-store finds needing work to become passable costume versions of earlier eras*, and the antique blouse.
I worked my way through the entire pile. The blouse made me nervous so I kept putting it off. Eventually the pile was gone, and only the blouse remained. It stared at me sadly for a few more months. Then I had an idea.
I'd acquired some seriously expensive and nearly edible tulle -- both genuine silk and super-fine synthetic. I use these to repair vintage hand fans. Maybe it would work as a collar lining?
I removed the rather revolting fabric dress shields from the underarms:
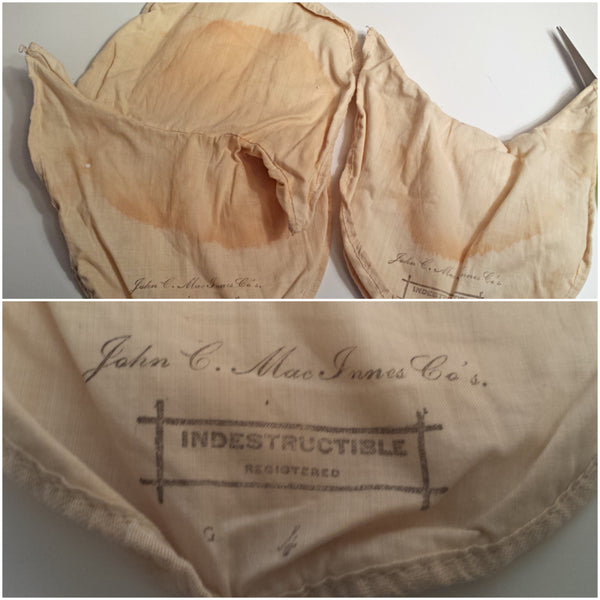
If you've ever wondered, "Should I use dress shields in my vintage, antique, and favorite modern clothes?" here's your answer. The lining beneath the shields is as bright, clean, and undamaged as can be after considerable wear and more than 100 years. They are the only unscathed areas of the entire lining:
Next came the easy part, reattaching the dangling sleeve. I just turned it inside out and stitched it back on with a basting stitch, same as on the intact sleeve. Both of these are "after" shots, but you can see how it attaches at a bit of silk stabilizer beneath the ruffle. Those aren't my stitches you see. Mine are on the inside:
I then stitched up or darned as best I could the largest holes in the lining. Next, it was on to the collar.
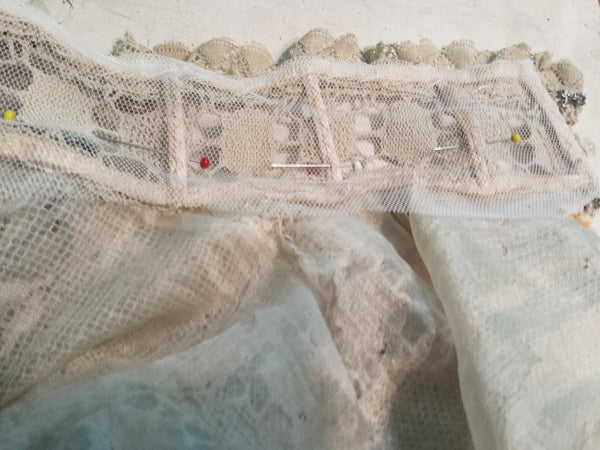
After removing any bits of silk lining still clinging to the satin-covered framework, I rearranged the stays so they were flat and evenly spaced. I then stitched all along the top, bottom, and each vertical, using cotton thread and biggish stitches, same as the originals:
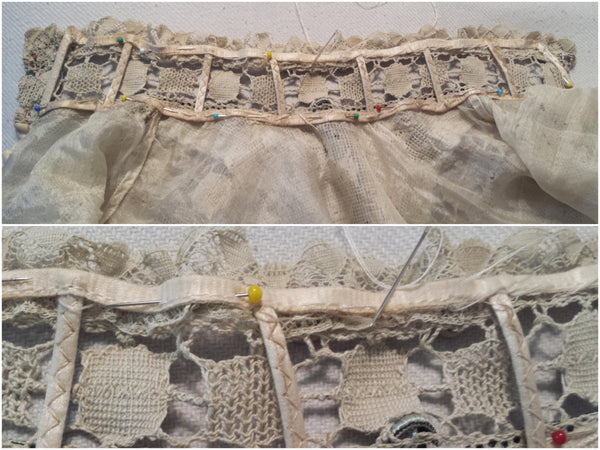
The silk tulle was too white, so I used the synthetic, which is equally fine, if not finer. I didn't measure, just eyeballed it, cutting a piece a bit larger than the frame. I turned the edges under twice, pinned it in place, and stitched it to the frame, keeping the tulle as smooth and flat as I could, and using the original needle holes from the old lining whenever possible. I did the bottom edge last:
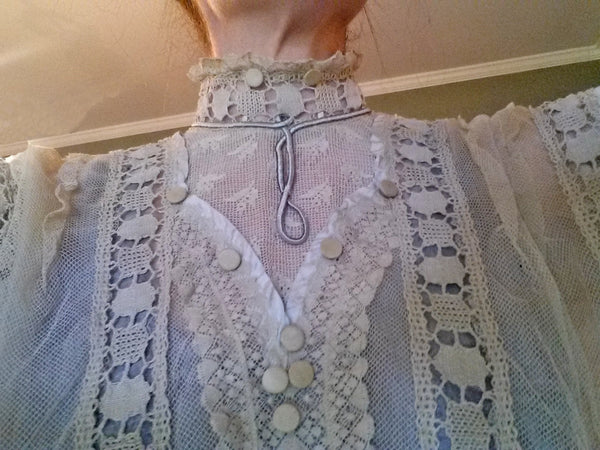
It wasn't difficult and I didn't have to undo or redo anything. How refreshing! Here's the result. Nearly invisible, which is the point: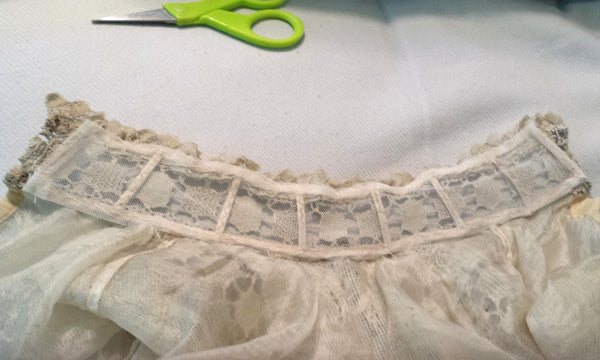
And here's how it looks on me:
Please forgive that I'm modeling it over yet another modern tank top. When the weather cools and we Atlanta Time Travelers find or create a turn-of-the-century event, I will show you the blouse worn with period-correct undergarments, that antique blue skirt I mentioned, and all the late-Victorian/early Edwardian trimmings!

* This is how I learned to make a belt using a vintage belt-making kit. I'll tell you about that process another time. It's fun!
UPDATE (12/7/2016): I finally wore the blouse (and coordinating skirt) to Historic Oakland Cemetery's "Victorian Holiday Festival" this past weekend.
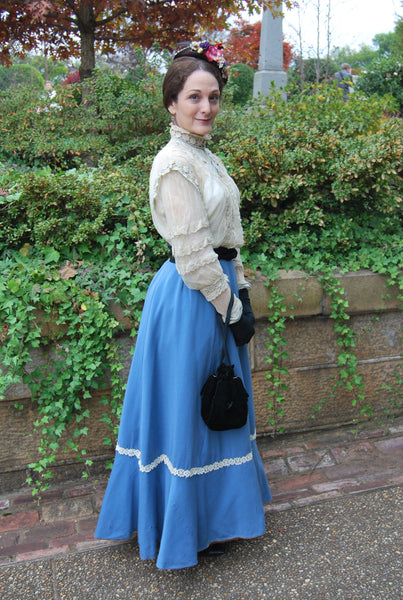 photo: (c) Philip Walker Photography
Comments
Liza, you did a wonderful job. Looking forward to seeing it on you with all the other antique pieces.
Brava! Your determination and hard work to preserve this lovely bit of history deserves a great deal of applause. You have certainly given it a brand new life. Beautiful!
I completely adore your writing style. You really make the characters, I mean objects come to life!
I greatly enjoyed this post. Your description of the procrastination and building up of one’s spine that’s necessary before one can approach such a daunting repair project was on the nose!
I have a burning question: which fabrics did they use in those vintage dress shields, could you tell?? The old advertisements claimed they contained no plastic, and also that they were “waterproof.” How are both possible?
I really want to sew some myself, but it’s a case of needing THE correct fabric (s). I have used modern disposable ones and dislike the lack of breathability and the crinkling sound they often make. But if I sew some of natural fiber light enough to not announce themselves on the outside of the garment, won’t the sweat just go right through to the blouse?
I would really appreciate if you could share more details about your detective work on those shields!
Thanks for sharing.
Thanks for your comment, Sam. I appreciate your taking the time to read the post and share your thoughts. FYI, there are all-cotton dress shields available now! You can even find them on Amazon. As for the old ones, they were cotton, and I’m guessing what made them “waterproof” was likely a core of what made old umbrellas and raincoats waterproof — a tightly woven cotton or linen fabric that’s been coated in beeswax (as you’d do for creating batik or old-fashioned tie-dye), or perhaps lightly coated in rubber. That said, the shield doesn’t really need to be fully waterproof to protect the garment. It’s more about being absorbent and limiting exposure to antiperspirants and deodorants, which can damage fabrics. Plain old sweat you can and should wash out after wearing, if it manages to soak through any shield you create. Keeping your garments clean is the best way to protect them. Never store anything that hasn’t been cleaned.